
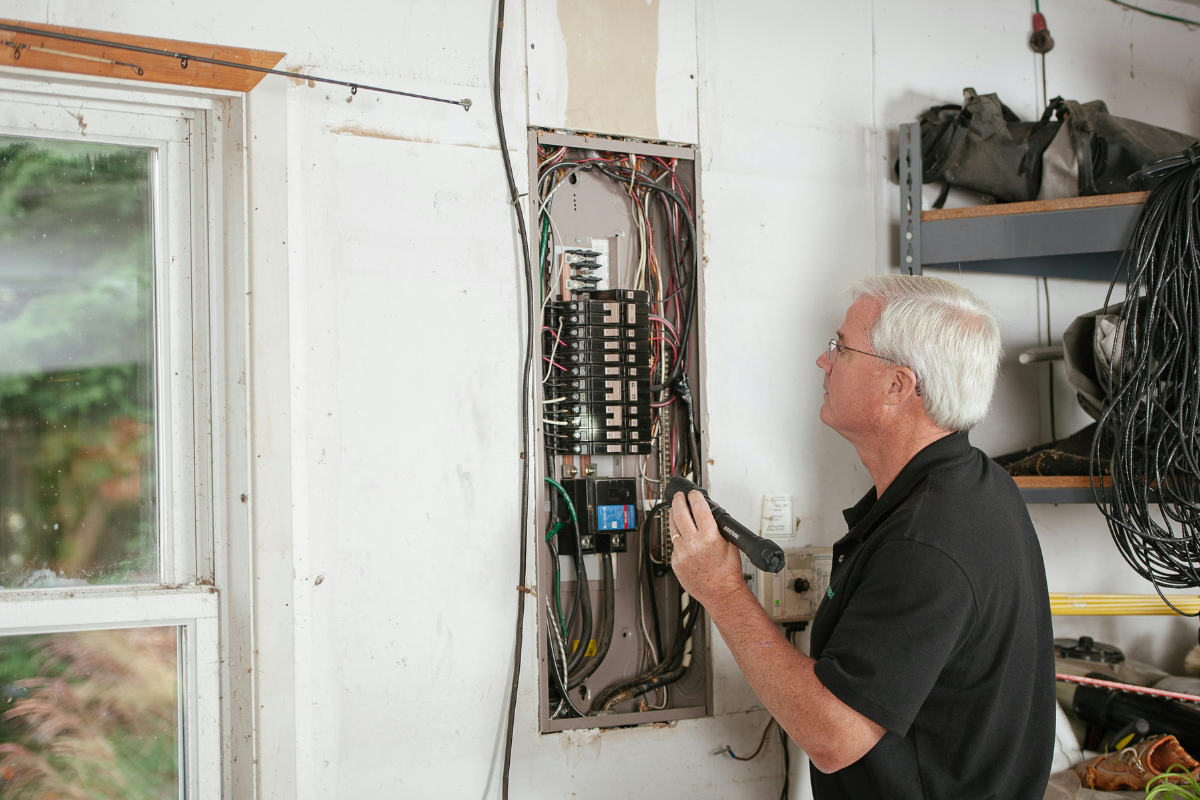

Replacing a worn or unsafe outlet looks simple on the surface. Two screws, a couple of wires, and you are done. That is the story people tell when it works out. The reality on a hundred different service calls is more nuanced. Houses carry their history in their wiring. Paint overspray, loose stabs on the back of devices, tired aluminum branch circuits from the 60s, bootleg grounds in old plaster walls, oversized breakers feeding undersized wire, and mystery junctions hidden by a remodel ten years back. An outlet swap can be straightforward, but only if you read the clues, test before you touch, and know when to stop and bring in electrician repair services.
This guide walks through practical judgment, not just a parts list. It leans on field experience, real failure modes, and the small habits that keep you safe. You will find step-by-step basics, but also edge cases like multiwire branch circuits and AFCI/GFCI compatibility. The goal is for you to handle routine replacements safely, spot problems early, and understand when same day electrical repair is worth the call.
Why outlet replacements deserve care
An outlet, or receptacle, does more than accept a plug. It’s a connection point for an entire branch circuit. A poor termination here can heat, arc, and char the insulation on conductors several feet back into the wall. I have opened boxes where a single loose backstab caused a chain of browned copper, brittle insulation, and intermittent power across half a room. A device that looks fine from the cover can hide carbon tracks and melted plastic behind it.
If your receptacle shows scorch marks, feels warm under load, trips a breaker when bumped, or drops voltage when a space heater starts, treat it as a system issue, not just a faceplate swap. Often, the outlet is a symptom. The cause could be a loose neutral upstream, a shared neutral with a compromised handle tie, or a backstabbed daisy chain.
Know your circuit and your codes
Electric work lives at the intersection of physics and local rules. Electricity follows your connections, but your local code authority sets where, how, and with what devices you are allowed to make those connections. National standards like the NEC provide a framework, then local amendments adjust requirements. Kitchens and bathrooms need GFCI protection. Many living areas now require AFCI. In older houses, grounds might be absent. Adapters and shortcuts don’t meet code and can be dangerous.
Before you start, identify the circuit. Confirm the breaker amperage matches the conductor size. A standard 15 amp circuit uses 14 AWG copper, and a 20 amp circuit uses 12 AWG copper. If you see 14 AWG on a 20 amp breaker, stop. That is an immediate hazard. Likewise, if you discover aluminum branch wiring, you are dealing with a different animal that needs specific devices or approved connectors. The choice between a standard receptacle, tamper-resistant, GFCI, or AFCI/GFCI combo is not a matter of taste. It follows location and code.
https://blackliteelectric.com/electrician/Tools, materials, and a sanity check
I bring the same core kit to every outlet replacement, no matter how simple the call sounds on the phone. A voltage tester that does more than light up at ghost voltages, a meter that actually reads 120 volts when true, a flashlight small enough to fit in the box, and the right screwdrivers. I add pigtails and wirenuts rated for the conductor count and type, a short length of 12 and 14 AWG copper for patching, and a handful of receptacles from a brand that holds up.
Pro tip from the field: buy spec-grade or commercial-grade receptacles instead of the cheapest residential ones. The cost difference is usually a few dollars, and the clamping force and screw threads are night and day. That extra grip buys you years of trouble-free service.
A safe workflow that scales from easy to tricky
Shutting off the breaker and testing before touching is basic. Doing it in a way that accounts for shared neutrals and mislabels on panel schedules is better. Here is a concise sequence that works whether you are swapping one living room receptacle or sorting out a string of kitchen outlets fed from a GFCI upstream.
- Kill power at the suspected breaker and try to turn on a lamp plugged into the outlet. If it stays lit, you have the wrong breaker. Keep going until the lamp goes dark. Open the cover plate. Use a two-pole tester or reliable meter to confirm hot to neutral and hot to ground both read zero. Test the tester on a known live outlet before and after. Pull the receptacle gently. Photograph the wiring before you touch anything. Labels and memory fail. Photos do not. Note wire count, gauge, and type. If there are two hots wired on a tab, or a red and black sharing a neutral, you might be on a multiwire branch circuit. Pause and evaluate. If anything feels off, such as heat marks, crispy insulation, or backstabbed daisy chains with more than two conductors under a wirenut, plan to remediate, not just replace.
That is one of the two allowed lists. The rest of this piece stays in prose.
Backstabbed connections and how they fail
Backstabbed receptacles save time during production builds. Insert a stripped wire into a spring clamp in the back and move on. They also loosen over time, especially with heat cycles from appliances, space heaters, or frequent plugging and unplugging. You get a high-resistance joint that warms, swells the spring, loosens even more, and spirals into arcing. I have pulled devices where the backstab hole was charred into an oval with brittle wire behind it. The face of the outlet looked fine.
When you replace a device, move all conductors to the side screws or clamps under the screws, not the push-in stab holes. Wrap a clockwise hook, tighten firmly, and tug test. On devices with pressure plates, ensure the copper sits fully under the plate, not on insulation. If you are daisy chaining power through, avoid using the device as the through path. Instead, splice the feed and onward conductors together with a pigtail to the device. This keeps the device from becoming a single point of failure for the entire circuit.
GFCI, AFCI, and where each belongs
GFCIs protect people from shock by tripping when they sense an imbalance between hot and neutral as small as 4 to 6 milliamps. Any outlet within six feet of a water source usually needs GFCI coverage, as do garages, exterior circuits, unfinished basements, and laundry areas. You can provide protection at the first receptacle on the circuit with a GFCI device feeding the load side, or you can use a GFCI breaker. Both meet the goal, but device-level protection is easier to retrofit in a finished space. Breaker-level protection is cleaner in a panel upgrade.
AFCIs protect against arcing faults that start fires inside walls. Many jurisdictions require AFCI protection in habitable rooms. You can use a combination AFCI breaker, or in some cases a listed outlet branch-circuit AFCI device. Be mindful that certain loads, like old vacuum cleaners or shop tools with brushed motors, can nuisance trip AFCIs. Quality devices have improved, but I still see occasional nuisance trips on older circuits with multiple splices. If you upgrade a living room to AFCI and see frequent trips under normal use, investigate loose neutrals, nicked insulation, or multiwire circuits missing a double-pole breaker or handle tie.
Combination devices that include both AFCI and GFCI exist, and they simplify compliance in kitchens where counter circuits may need both forms of protection depending on your code cycle. They cost more, but they save panel space and eliminate layered protection conflicts.
Aluminum branch circuits and CO/ALR details
If your receptacle feeds with aluminum wire, treat it as a separate category. Aluminum expands and contracts more than copper under heat, oxidizes, and creeps under screws. Standard receptacles are not listed for aluminum terminations. You need devices marked CO/ALR, or you must transition aluminum to copper with approved connectors like COPALUM or AlumiConn. The first requires a trained technician with specialized tools. The second can be done by careful hands inside a box that meets cubic inch fill requirements. Either way, the safe fix is not to jam the aluminum under a brass screw on a standard receptacle. I have seen those joints fail and leave soot in the box.
If aluminum is present, many homeowners choose to bring in electrician repair services. A proper plan might involve selective rewiring, panel corrections, or device-by-device remediation.
Bootleg grounds and how to spot them
Three-prong receptacles require a ground. In older homes without grounds, some folks used to connect the neutral to the ground terminal on the device. That looks correct on a plug tester, but it creates a dangerous condition where the metal yoke and any connected metal faceplate can be energized. You can spot this when a non-contact tester lights up on the yoke, or when you measure a suspiciously low difference between neutral and ground under load. You might also find a jumper from the neutral screw to the green ground screw on the receptacle. That is a red flag.
In a no-ground scenario, you have a few choices. Install a GFCI receptacle and label it “No Equipment Ground.” This provides shock protection even without a ground, and it is an accepted approach in many jurisdictions. Alternatively, add a grounded conductor by running new cable or a separate equipment grounding conductor to the panel or to the grounding electrode system if permitted. Painted metal conduit that is continuous and correctly bonded can serve as a ground, but do not assume it is intact. Test continuity with a meter from the box to the panel ground bar.
Box fill and the crowded reality behind the wall
Every electrical box has a volume rating in cubic inches. Each conductor, device, and clamp consumes a certain volume. Overfill leads to tight bends, insulation damage, and poor device seating. When I find four 12 AWG conductors, a couple of wirenuts, and a large GFCI cram-jammed into a shallow metal box, I do not force it. I change the box. A 22 cubic inch old-work plastic box is cheap and gives breathing room. If you must keep a metal box for conduit continuity, use a box extender or a deeper box and ensure the bonding pigtail is correct.
While you are in there, inspect for cable sheathing extending into the box, not stripped too short. Check that the clamp is not biting into the conductor. Make sure the ground pigtail is long enough to keep the device bonded even when pulled out for future service.
Split circuits, switched half-receptacles, and lost tabs
Not every receptacle has both halves hot all the time. In living rooms, it is common to see a switched half-receptacle for lamps. That setup uses a tab broken on the hot side, with one hot always on and the other controlled by a wall switch. When replacing, note whether the tabs on the old device are intact or broken. If you install the new device with both tabs intact, you may defeat the switched function. Worse, if you cross-wire a multiwire branch where the two hots are on different phases without a handle tie, you can overload the neutral or create 240 volts across the device.
Before you remove the old receptacle, look for a red wire or any secondary hot tied to a switch. If present, recreate the tab break on the new device as needed. For multiwire branches, confirm a double-pole breaker or listed handle tie ties the two hots together so both disconnect simultaneously. If you do not see this in the panel, that is a strong case for same day electrical repair by a pro. It is not a cosmetic issue, it is a safety requirement.
The quiet art of making a solid termination
The difference between a joint that lasts thirty years and one that loosens in two comes down to small habits. Strip the right length. Burrs or nicks in copper create stress points that break under vibration. If you see strands or a chewed edge from dull strippers, cut back and re-strip. For side-screw terminations, form a clean clockwise hook that sits flat under the screw head. Tighten to firm torque. If your driver spins off before the screw bites, you are not tight enough. On devices with pressure plates, ensure the conductor sits centered and straight.
Pigtail your grounds. Do not rely on the yoke to carry ground through to the next device. Use a crimp sleeve or a wirenut rated for the conductor count, with a short green or bare copper pigtail to the green screw on the device. Tug test each joint. A firm tug reveals a loose crimp before you push everything back in and cover it up.
Testing beyond the plug-in three-light tester
The cheap three-light plug testers have their place, but they cannot see everything. They misread bootleg grounds as safe, and they do not measure voltage drop under load. After replacement, verify with a meter. Check hot to neutral and hot to ground at about 120 volts. With a known load like a 1500 watt space heater, check voltage again. If it sags below about 110 volts at the outlet while steady at the panel, you have resistance in the circuit that needs attention. Warm devices or humming under load are clues. Scan for heat after five to ten minutes with the load on. Your hand is a decent sensor. No part of the device or cover should feel more than modestly warm.
If a GFCI trips immediately with nothing plugged in, reverse line and load connections or a neutral-to-ground fault somewhere downstream is likely. Isolate by removing downstream conductors and retesting, then reconnect one segment at a time.
When a “simple” swap points to a bigger problem
Sometimes the outlet is the gateway to a bigger repair. Here are scenarios where a safe person stops and calls for electrician repair services:
A breaker trips instantly when you insert the device back into the box. That suggests a nicked conductor contacting the yoke or box, or a miswired multiwire branch creating a short. Forcing it risks arcing and damage.
Aluminum wiring appears in the box. Without the right connectors and devices, a swap is not a swap. It is the first step to a failure.
Multiple circuits appear in one box without a clear separation. Testers show power on both halves of the device on different breakers. This can be legal if handled properly, but cross-connecting neutrals or grounds incorrectly will cause dangerous conditions.
No ground exists, but a three-prong was installed previously with a bootleg jumper. Converting to a GFCI with correct labeling is a safe fix, but if multiple downstream outlets feed from this point, plan the load side carefully or opt for a GFCI breaker to protect the whole run.
Severe heat damage or charring extends into the cable sheathing. The insulation is likely compromised beyond the box. You may need to cut back and splice in new conductors in an accessible box, or run a new cable.
Same day electrical repair makes sense when power loss affects a fridge, medical equipment, or heat source, or when you discover any of the above hazards mid-project. Pros carry the parts and testers to resolve it quickly and safely.
Ground-fault protection in kitchens and bathrooms
Kitchens today typically require GFCI protection for all countertop receptacles, and AFCI for the branch circuit feeding the room, depending on your code cycle. Two small appliance circuits at 20 amps each are common, serving countertops with no other loads. If you are adding a GFCI device on an existing run, place it at the first outlet in the series and connect downstream to the load terminals. Mark downstream outlets as GFCI protected. If every box is crowded or the first box is buried behind tile, a GFCI breaker in the panel is cleaner.
Bathrooms need GFCI protection for receptacles, and modern requirements often call for a dedicated 20 amp branch for bathroom receptacles only. If your hair dryer dims the lights dramatically, you may be on an older shared circuit. The fix is not a beefier outlet. It is a properly sized dedicated circuit, which is a job for a licensed pro.
Exterior outlets and weather considerations
Outside outlets must be GFCI protected, in weather-resistant receptacles with in-use covers. The device marking WR signifies weather-resistant materials. Pair them with a listed in-use cover so cords can remain plugged while the cover closes. In cold climates, back boxes should be sealed to the siding with appropriate gaskets and caulk to keep moisture out. Condensation can corrode terminations over time. I have found oxidation inside boxes that looked fine outside, especially on houses with wind-driven rain. Periodic inspection helps. If an exterior outlet trips after rain, pull it, dry the box, verify the seal, and consider upgrading to a higher quality device and cover.
Small details that affect longevity
How you fold the wires back into the box matters. Keep the neutral and hot on opposite sides if possible. Fold conductors in an accordion pattern rather than a tight loop, so the device slides without pinching. Avoid pushing hard against the back of GFCIs, which can dislodge connections on their terminal plates. Do not overtighten the mounting screws and warp the yoke. A warped yoke leads to crooked plugs and loose contact over time. Use a torpedo level if you care about cosmetics, but also to keep stress off the device face.
Faceplates are not just decoration. Metal plates on an ungrounded box can become energized if a hot conductor touches the yoke. Plastic plates reduce that hazard. On the other hand, in commercial spaces with metal boxes and proper bonding, metal plates are durable and acceptable.
Cost realism and product choices
Spec-grade receptacles from well-known brands cost roughly 4 to 8 dollars each for standard duplex, versus 1 to 2 dollars for the cheapest residential type. GFCIs run 15 to 30 dollars, AFCI/GFCI combos 35 to 50 or more. If you replace a handful of outlets a year, the marginal cost is minimal compared to the benefit in clamping strength and longevity. I have revisited jobs where cheap devices loosened within two years under modest use. The spec-grade ones I installed in similar settings ten years ago still test tight.
Tamper-resistant is now standard in many jurisdictions. The shutter mechanism adds a small insertion resistance. Quality devices feel firm, not gritty. If a plug stabs feel gritty, that is often a sign of a very low-cost device or dust inside a used device. Replace it.
Troubleshooting odd symptoms after replacement
A few patterns repeat.
If lights dim when you plug in a toaster elsewhere on the circuit, check for shared neutrals and loose neutral joints. Voltage drop on the neutral can masquerade as dimming when loads shift.
If a GFCI trips when a treadmill starts, the treadmill may leak a few milliamps as part of its EMI filter. Try a different circuit and verify the treadmill is not defective. If several equipment types trip the same GFCI, suspect shared neutral miswiring downstream or moisture intrusion in an exterior box.
If your non-contact tester indicates voltage on the ground and the device tests normal with a plug-in tester, investigate for a bootleg ground or induced ghost voltage on a long run. A real meter reading hot to ground will tell you more than a beeping pen.
If a breaker trips hours after you replaced an outlet, heat may be loosening a marginal joint. Open the box, inspect the terminations, and consider re-terminating with pigtails. Use a thermal camera if available. If not, carefully check for warmth with power off, then on with a load.
When a pro pays for themselves
DIY has limits. Pulling a device and swapping it like-for-like is one thing. Sorting out a multiwire branch circuit, correcting legacy bootlegs, resizing boxes, navigating aluminum remediation, or upgrading to AFCI/GFCI across a mixed-age home calls for experience and a full kit. Electricians live in these edge cases. They also carry liability and know the inspection expectations. If your project touches the panel, involves running new cable through finished spaces, or presents any signs of overheating, call in electrician repair services. For urgent situations where a fridge or furnace is offline or a circuit smells like toasted insulation, same day electrical repair can save a lot of cleanup, not to mention risk.
A realistic, safe path to a reliable outlet
Approach each outlet with a short checklist in your head. Confirm power is off with a real test. Document wiring before changes. Prefer side screws or pressure plates over backstabs. Pigtail feeds and grounds. Choose devices that match the environment and code: GFCI where required, AFCI where required, weather-resistant outdoors, tamper-resistant in living spaces. Respect box fill. Fix what you find, not just what you came for. Test under load and feel for warmth. If you encounter aluminum, multiwire branches without handle ties, bootleg grounds, or heat-damaged conductors, pause and bring in a pro.
Electrical repair seems mundane until you see what can go wrong behind a tidy wall plate. The time you invest in careful technique and good materials pays you back in quiet reliability. The outlet that never calls attention to itself is the best kind. And if you need help, the right electrician will not only fix the present issue but leave the circuit stronger than they found it, which is the real mark of quality electrical repair.
Blacklite Electric Inc.
Address: 1341 W Fullerton Ave #148, Chicago, IL 60614
Phone: (312) 399-3223
Website: https://blackliteelectric.com/